2026-03-20 03:29:12
1.1k
71
🔴 Ultimate Assembled Magnetic Pokéball | Easy Print (No AMS Required!) ⚪

@Gennis_2720527
打赏
私信
关注
推荐打印方式
添加
🔴 Official Starter-Friendly PokeBall | 0.3mm Loose Tolerance | No AMS ⚪
Kobra X
Kobra 3
、
Kobra 2
、
Kobra S1
、
Kobra 4
、
Kobra 3 V2
、
Kobra 3 Max
、
Kobra 2 Max
、
Kobra 2 Pro
、
Kobra 2 Neo
、
Kobra 2 Plus
/ 分盘:3
/ 2h48m
37
分享


描述
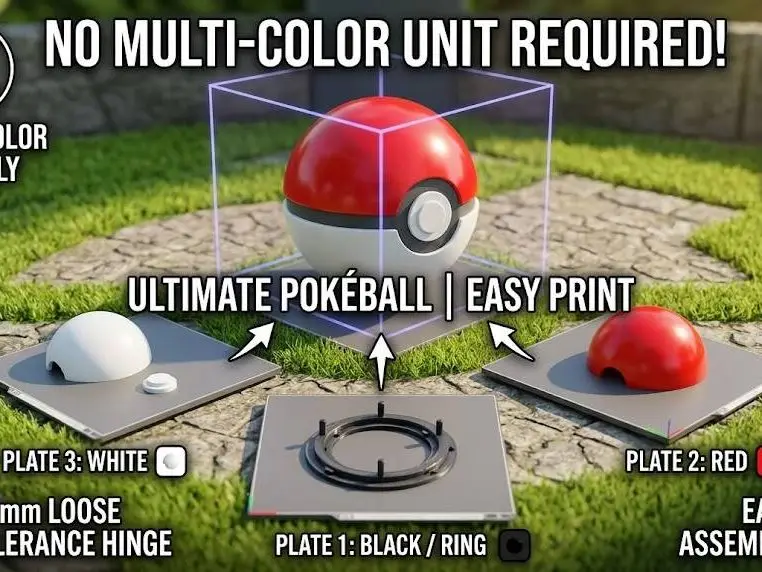
love Pokémon but only have a single-color 3D printer? No problem! ⚡
This Pokéball is designed to be 100% single-color friendly. No expensive multi-color systems (AMS/MMU), no filament swaps during printing, and no painting required. The design uses mechanical assembly and strong magnets for a premium, functional feel. The model includes a clean, print-in-place hinge mechanism.
🛠 Technical Specifications & Tolerances
- Print-in-Place Hinge: Designed with a 0.3mm 'Loose' tolerance gap. This version is optimized to work flawlessly on almost any 3D printer without the hinge fusing.
- ⚠️ Critical Tip: Ensure your Elephant Foot Compensation is correctly calibrated in your slicer to prevent the hinge from locking on the first layer.
- Printable Pins Included: Alignment pins are included in the files, but you can use 3mm machined metal pins if you prefer.
🧲 Hardware Required
- Magnets: I used 6mm x 1.75mm (nominal 6x2mm) cylindrical magnets.
- Link (Optional but recommended): https://www.amazon.com/gp/product/B07KJ9H31P?th=1
- Glue: A small drop of superglue (Cyanoacrylate) is required to secure the pins and magnets.
🔧 Detailed Assembly Instructions (Follow the Collage!)
- Prep & Pin Alignment (See Panel 1): Insert the alignment pins into the peripheral holes of the white lower dome. IMPORTANT: The 8mm pins go into the rear holes (closest to the hinge area), and the 6mm pins go into the front holes. Secure with a tiny drop of glue.
- Hinge Ring Attachment (See Panel 2): Fit the black hinge ring onto the pins. The ring contains the print-in-place hinge mechanism. (Do not glue them yet!).
- Magnet Test & Fix (See Panel 3): Insert the first two magnets into the recesses on the black ring (front left and right). Verify that they attract each other correctly. Once confirmed, secure them with glue.
- Top Dome Prep (See Panel 4): Attach the top dome's corresponding black ring and insert its magnets. ⚠️ DO NOT MISS THIS STEP: Verify polarity again against the already glued magnets in Step 3! Glue the top dome to its ring.
- Complete the Hinge (See Panel 5): Attach both assembled domes to complete the main hinged unit. The hinge should operate smoothly.
- Button Assembly & Attachment (See Panel 6): Assemble the three small button parts (black outer ring, black inner ring, and white central button). Glue the entire button assembly to ONE hemisphere of your choice.
标签
版权声明